Configuring Audiences
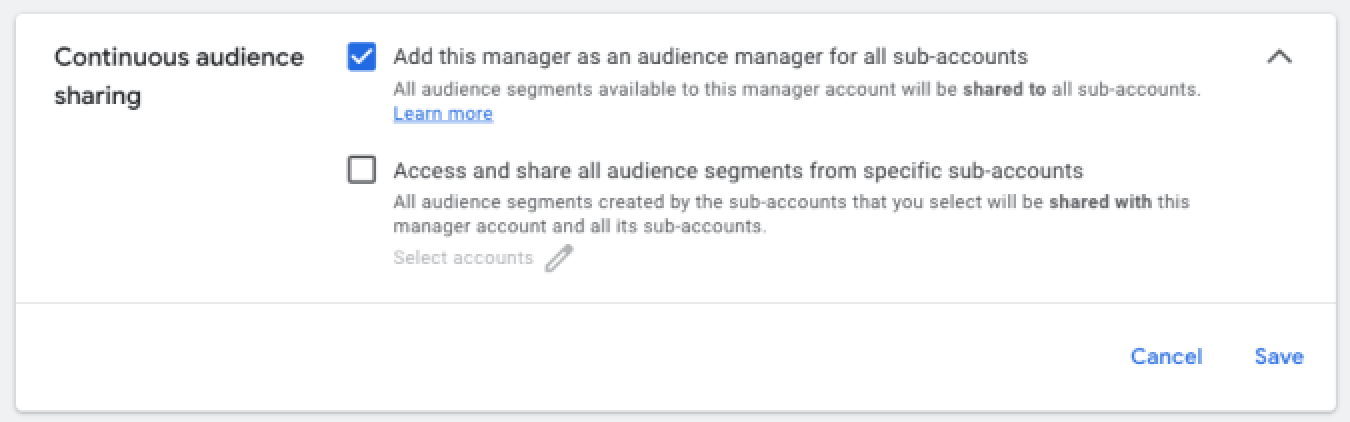
First of all, if you have multiple Google Ads accounts, as best practice create the Opticks Audience in your Manager Account (MCC) and activate the Audience sharing. In order to make Opticks’ audience available to all your accounts, your MCC (Manager Account) account needs to be configured to share audiences with its child accounts. Select “Continuous audience sharing”.
You can learn more here.
Alternatively, you can create the Opticks Audience directly in each of your Google Ads accounts, repeating the steps below for each one.
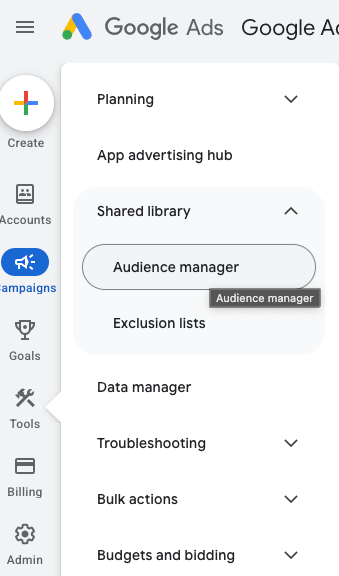
To create the Audience, first go to the Google Ads sidebar menu and click on Tools > Shared Library > Audience Manager
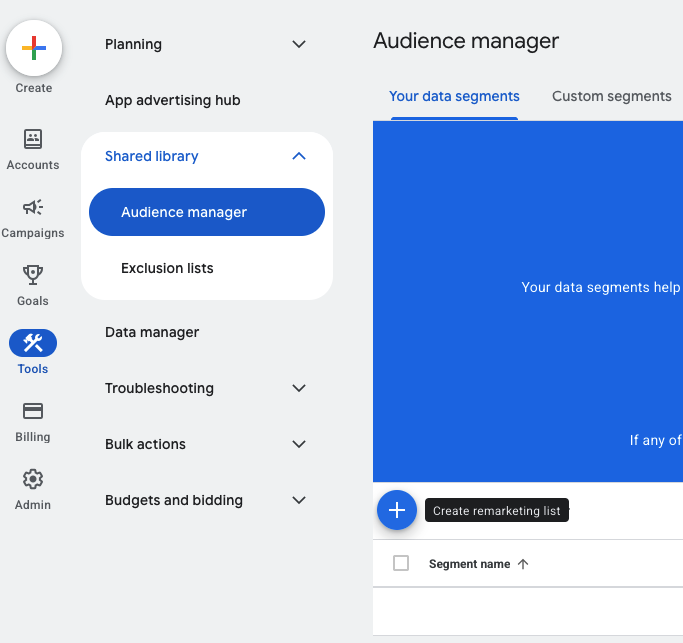
Then, in the “Your data segments” tab, click on the blue button (+) to create a new Remarketing list.
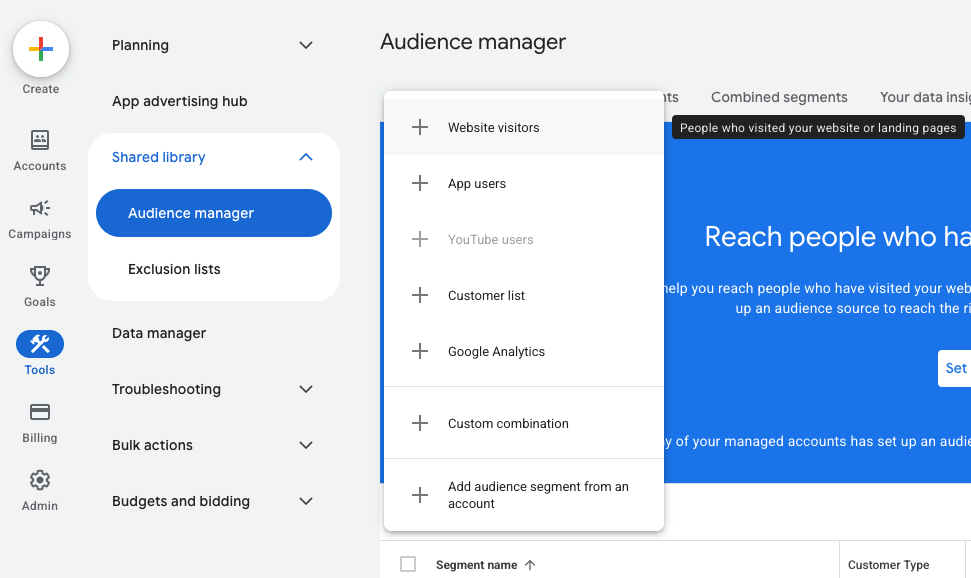
In the next dropdown, select “Website visitors”
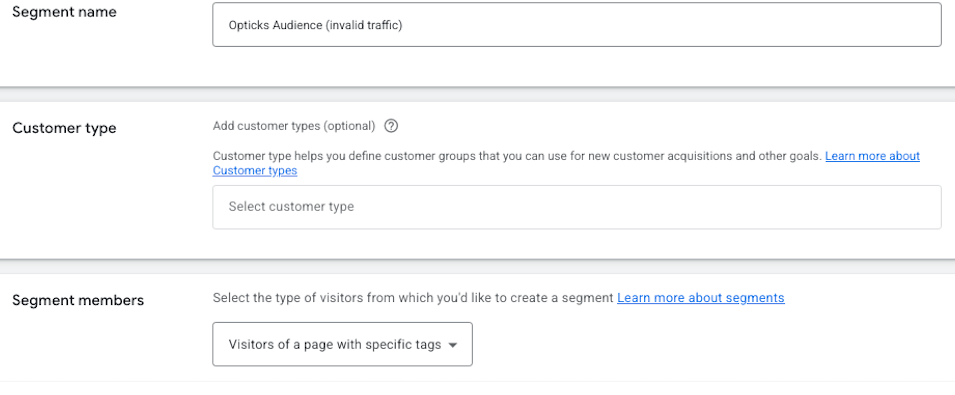
Now fill the segment information with the following data:
Segment name: "Opticks Audience (invalid traffic)"
Customer type: Do not fill this option
Segment members: select "Visitors of a page with specific tags"
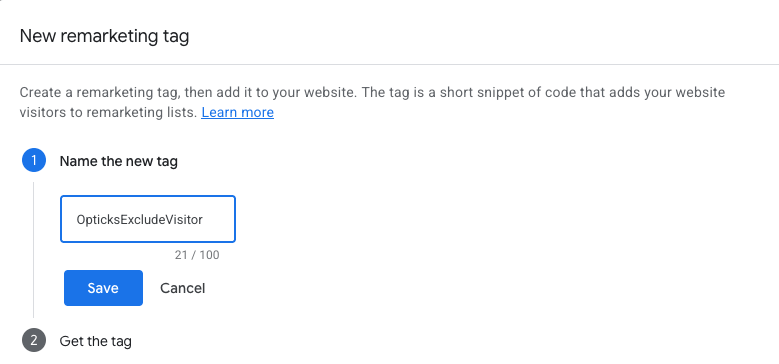
Once segment members are set to “Visitors of a page with specific tags”, a tag selector will appear. Search for a tag named “OpticksExcludeVisitor”. If it doesn’t exist, which is the most common case, click under “New tag” and create it. Name it “OpticksExcludeVisitor”.
Click the “Save” button and then in the “Get the tag” section, search for “Event snippet” and look for the “send_to” line. If the “OpticksExcludeVisitor” tag did already exist, hover over it and click on the info icon in order to see the “Event snippet”.
An id with the following format will appear there: 'AW-12345678/aBc1DeF2gHi3JkL4mNo_'
Copy that id. This is the id you need to add to the “Google Ads Conversion Id Management” section in the Opticks app. You must not copy or add this code snippet anywhere else, just add the id to Opticks and it will send the event when appropriate.

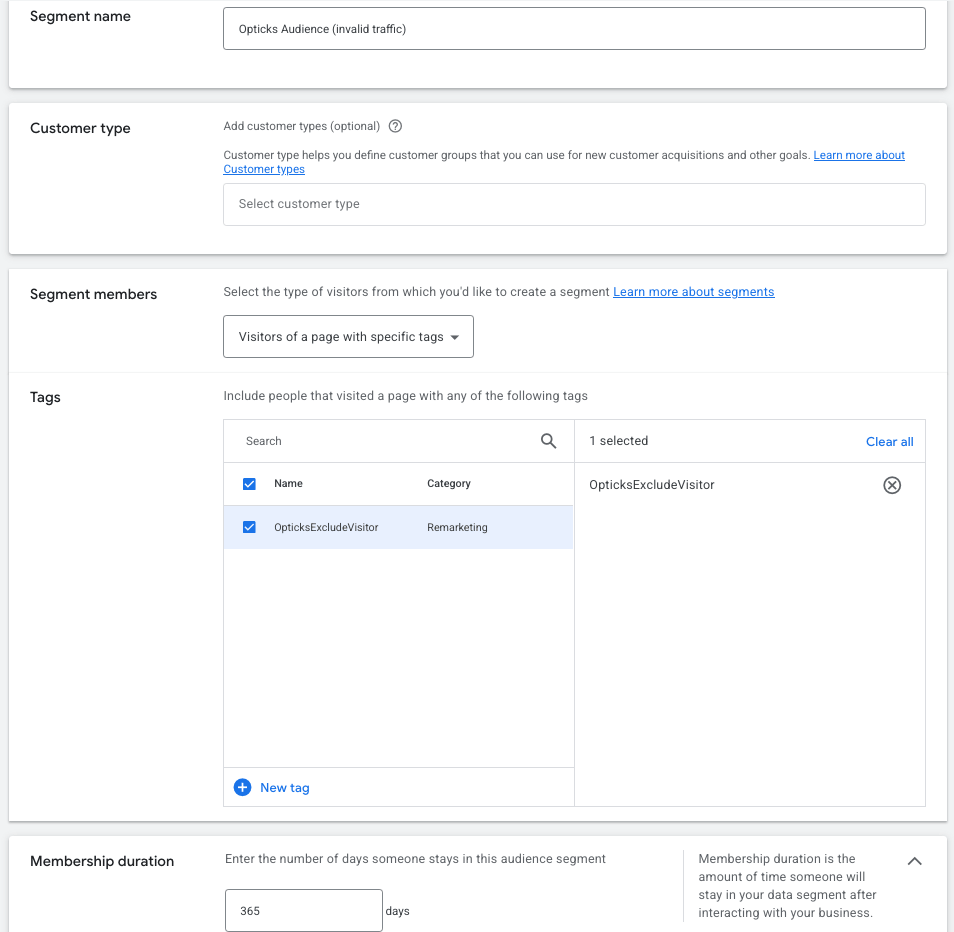
Once copied, click on “Close”, select the checkbox in the “OpticksExcludeVisitor” tag and scroll down to membership duration. Set it to 365 days, and then click on “Create segment”. Your whole segment configuration should look like this:
Once finished, go to your Opticks Google Ads Conversion Id Management and add the id you previously copied.
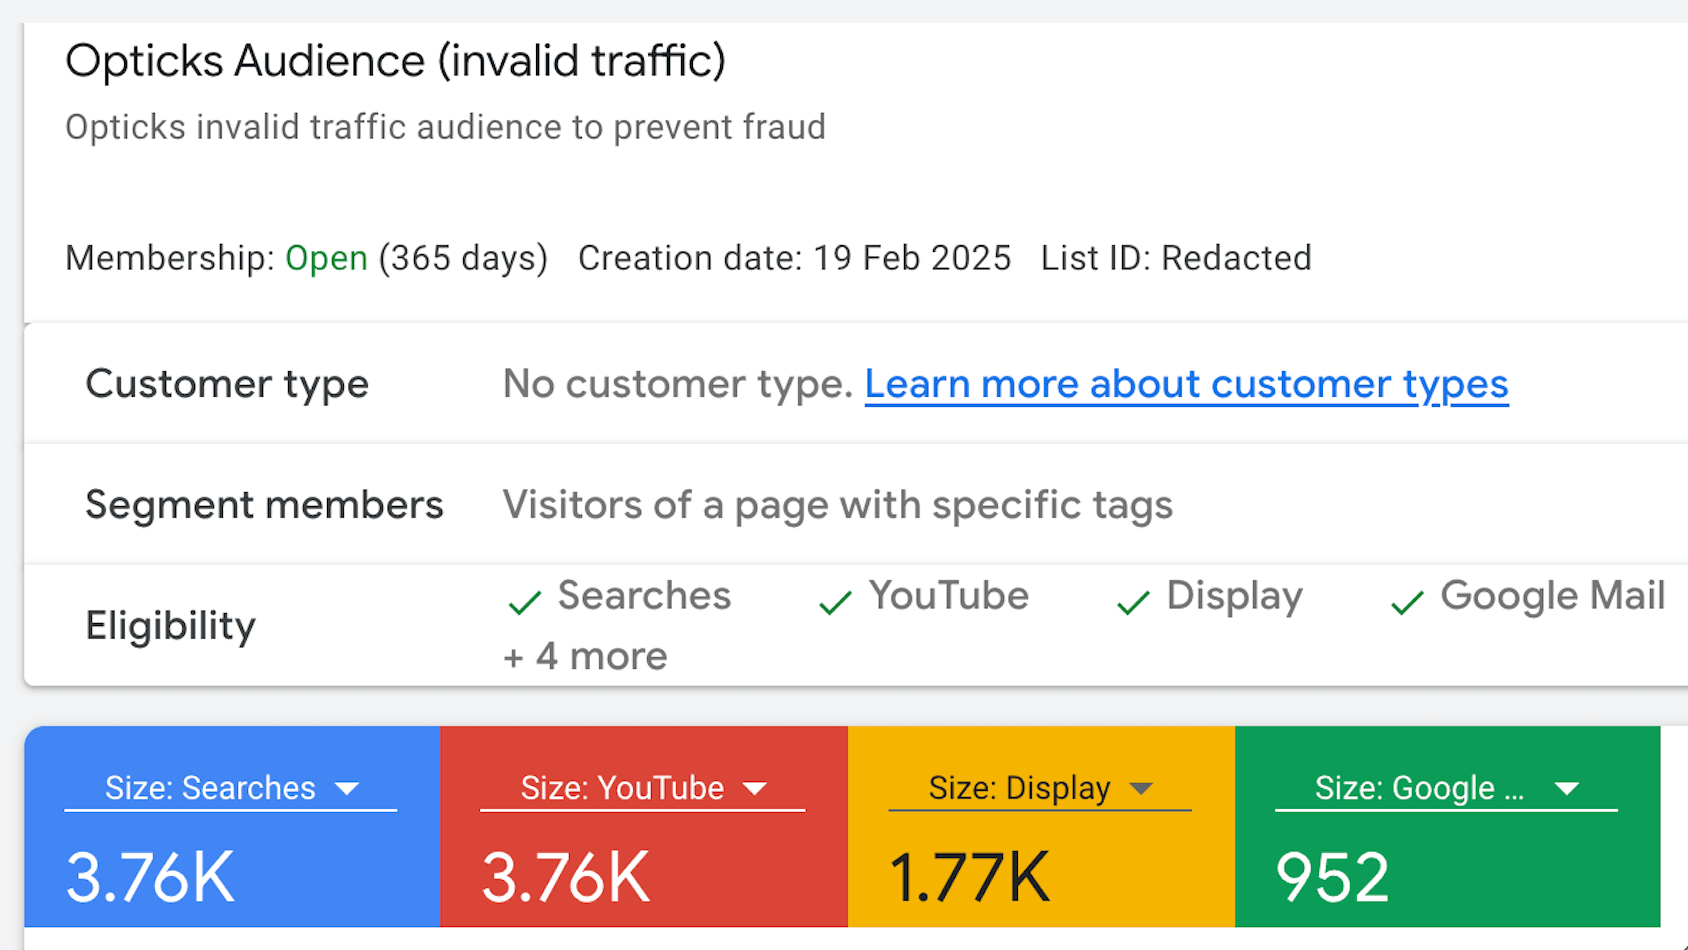
The Opticks Audience will now appear in your Audience manager. Once it has reached the minimum required population, you will be able to exclude it in your Search and Display campaigns, and create negative conversion rules in your Performance Max campaigns.
Configuring Opticks Audience in your campaigns
It might take up to 48-72 hours to see the Opticks Audience populated.
You can see the size and availability of the audience in the Audience Manager of your Google Ads account (from the side menu: Tools > Shared Library > Audience Manager).

As soon as the audience is ready to use, you can exclude it in your Search, Shopping and Display and PMAX campaigns.
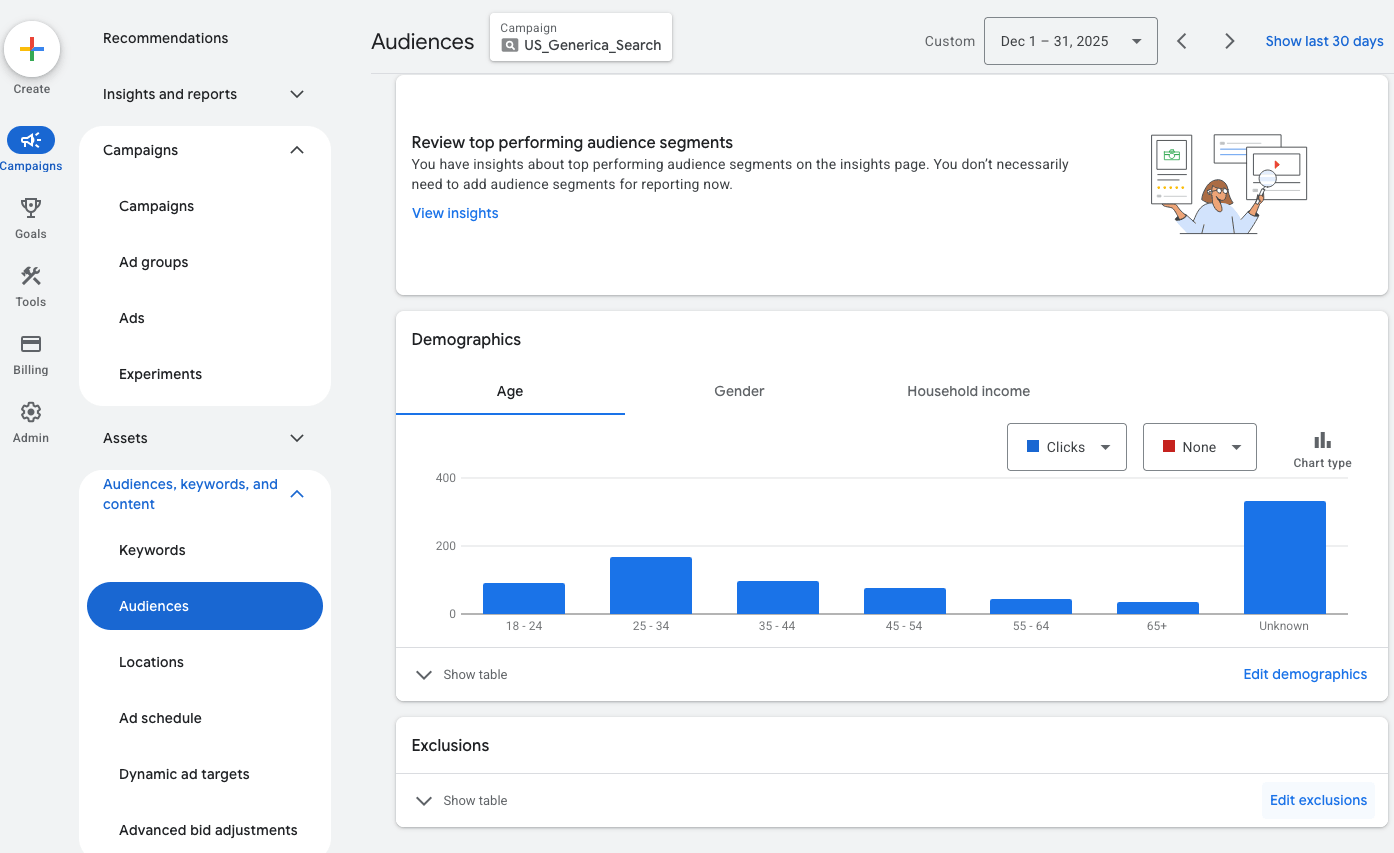
Excluding in Search and Display campaigns
In order to do so, browse to the Campaigns section in the side menu, and then go to your campaign (click on it in the campaigns table, or just use the selector at the top of the screen). Then click on the “Audiences” section on the left panel. Once there, at the bottom of the screen, you will see the “Exclusions” module.
Click on “Edit exclusions” and select “Campaign”. You will see the following screen:
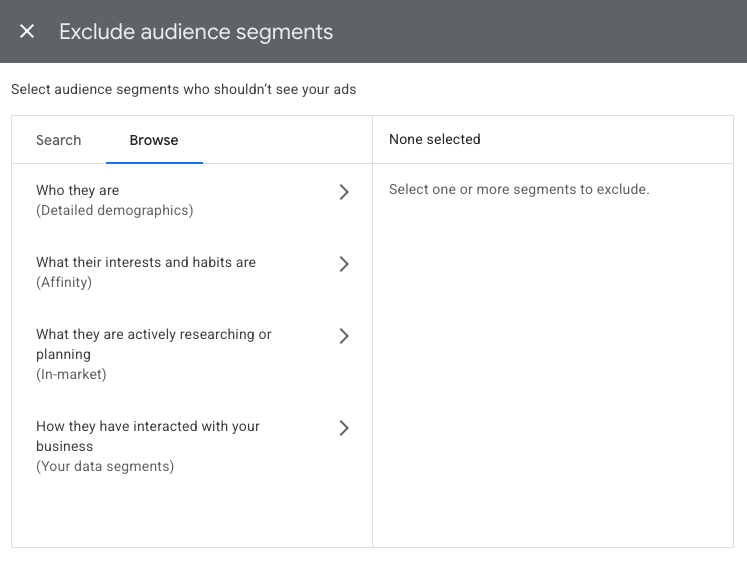
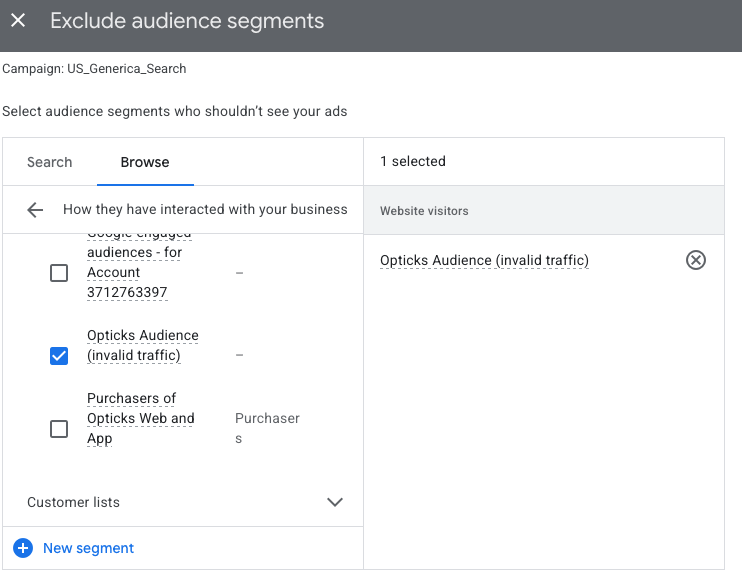
On the “Browse” tab, select “How they have interacted with your business (Your data segments)”, select “Website visitors” and search for the “Opticks Audience (Invalid traffic)” audience. Note that you might have to scroll the list in order to see it. Select it and click the “Save” button at the bottom of the window.
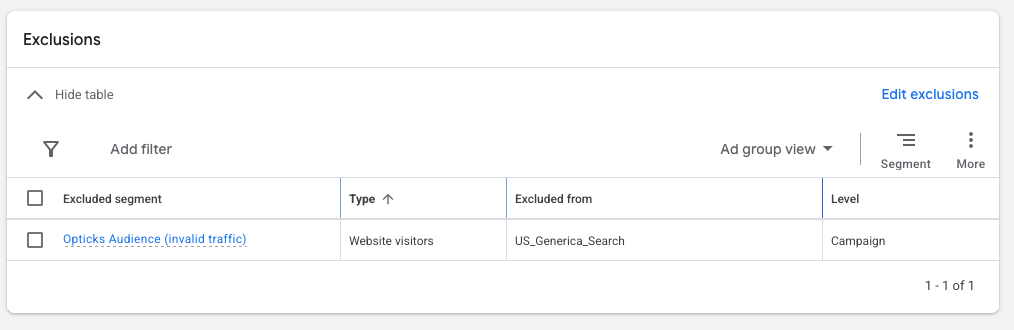
Then, back to the audiences screen, you can expand the table at the bottom of the page to review the Opticks Audience is now correctly excluded:
You can learn more about how Audience exclusions work and its effects here
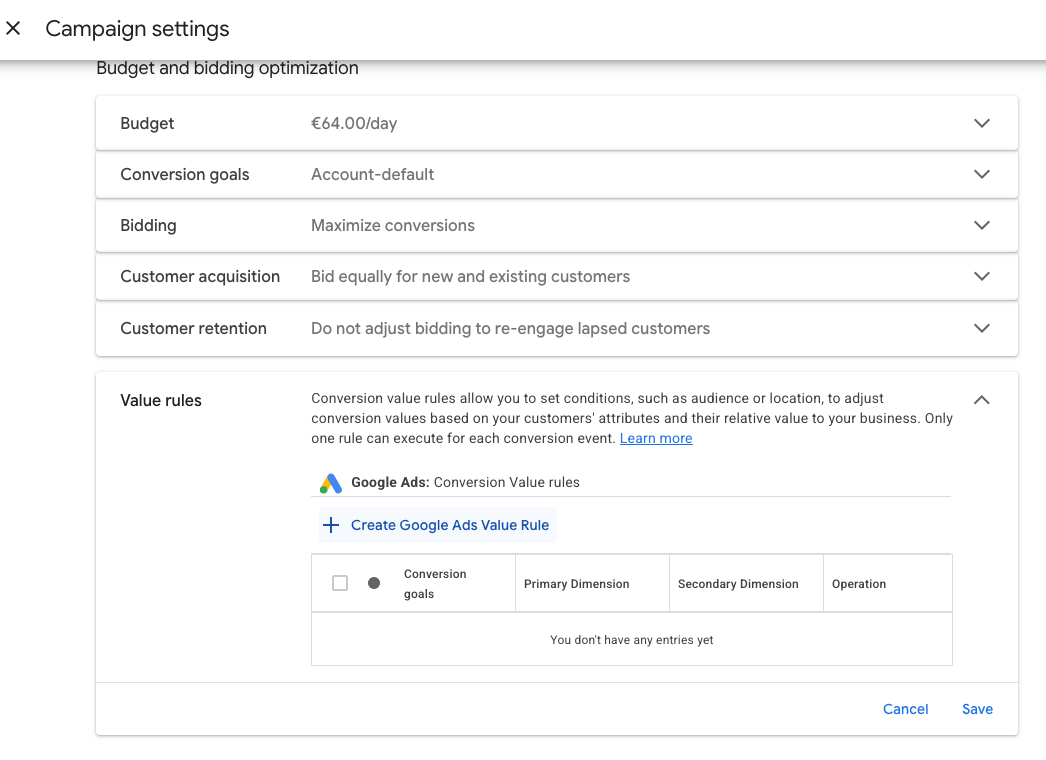
Excluding in PMAX and Shopping campaigns
These campaign types do not support direct exclusion of audiences. Instead, we can add the audience with a negative weight, so effectively that traffic is excluded.
Browse to your campaign “Settings” and then search for the “Value rules” section and click on “Create Google Ads Value Rule”.
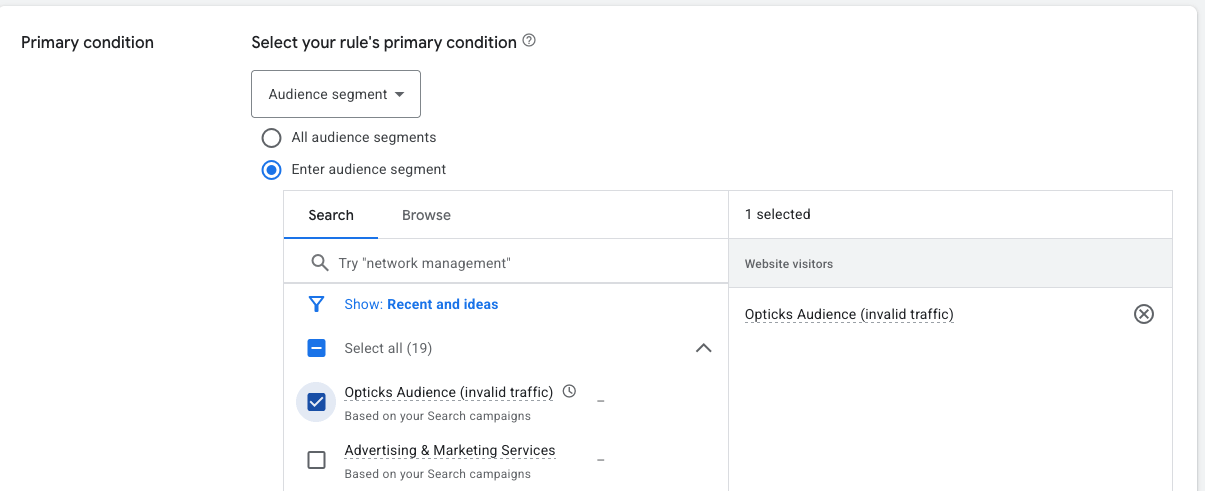
In the “Primary Condition” dropdown, select “Audience segment” and select the “Opticks Audience (invalid traffic)” segment.
Ignore the “Secondary condition” option and in the “Value adjustment” section, select “Multiply” and set 0.5 as the Value.
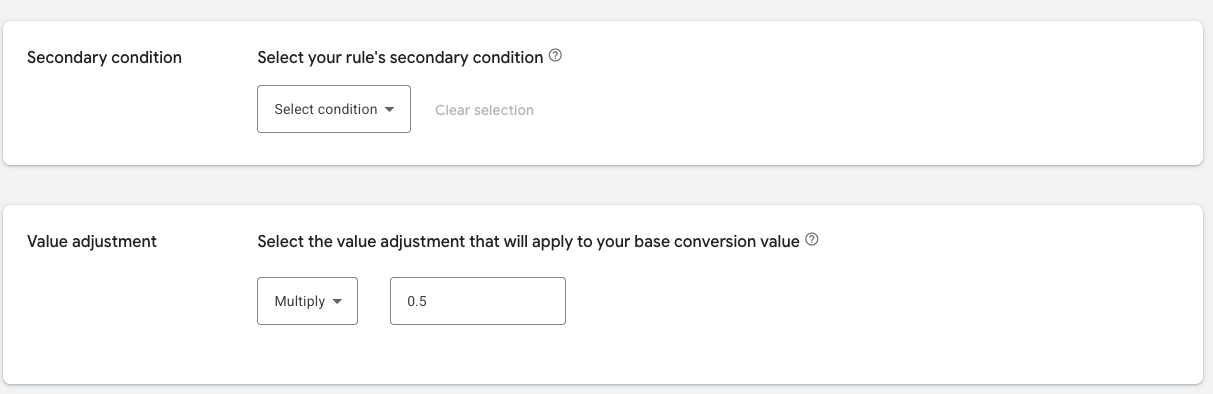
Then click “Save” in both the Rule creation window and your campaign settings. After that, it should look like this:

By following these steps, the Performance Max algorithm will start following Opticks signals to stay away from invalid users.